


You as an android device users should be proud, because this smartphone is not only used as a means of entertainment, but also can be used as a tool in supporting your work. Presentation, often done from your living as a student, student, employee to a professional. Android can also be used as a means to simplify your presentation. In this article, let us share how to make a presentation by using the android.
Introduction
Hardware and software is one that you should prepare before the presentation, if you frequently mobile, then the android provide convenience to you. You do not need much to bring hardware and software that sometimes even make you inconvenience.All you need to take when presenting with android:
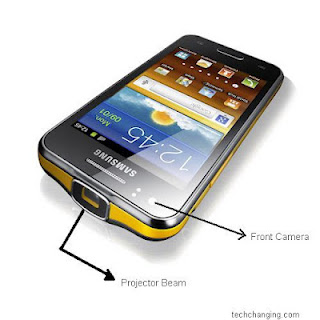
1. Your android hardware support directly to the presentation (build in)For example, if you are using android device that has the ability to project the view directly without the need for additional devices (such as a projector for example), some devices such as Android build in support for example is: Samsung galaxy beam
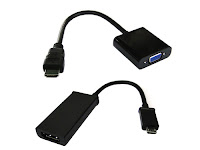
2. Android requires hardware enhancements to presentation
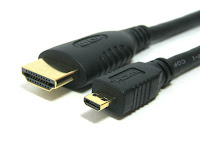
For example using the projector. Then you should connect your device with a projector. The way to connect devices to the projector android cable is required, but keep in mind that not all android devices can you connect to the projector by using a cable.
3. Your android does not support directly connected to the projector
If your device does not support directly connected to the projector, you don't need to get discouraged, because you can still use the android to the presentation. In this article I want to share to you, especially in cases when the android does not support hardware directly connected to the projector.
Steps should you take, first connect your android device (PC) connected to the projector and then control the device using the android. There are a lot of applications are available to control the PC using the android.
Steps should you take:
1. Download Unified Remote application (click the image below)

(Free Version)

(Full Version/Mirror)
2. Download Unified for PC here. Make sure your PC has Net Framework 4 installed
3. If Using Bluetooth Connection
- Turn on booth Bluetooth and Pairing
- Run unified remote application on android and PC
- Choose the Server
- Click add button and choose automatic option
- It will scan the available Bluetooth automatically
- Choose paired Bluetooth than click back button on your android
- Choose Remote Menu
- It will come out a few menus to choose.
4. If Using Wifi Connection
- Turn on booth Wifi
- Configure your PC
Add a firewall rule to allow port Unified Remote (9512) :
4.1. Open the windows firewall. Control Panel -> All control panel items -> windows firewall or the firewall just typing in the search box.

4.2. Click Advance settings
4.3. Select the type of connection, (inbound or outbound rule rule). if the computer receives data from outside the select inbound rule (in = incoming). If the computer sends data to select the outbound rule out (out = out). On the application of unified remote select inbound rule.
4.4. Click new Rule

4.5. Choose the Port and next, then type in Port and next

4.6. Allow the connection and next
4.7. Next and fill in the name and descriptions si nama dan description

4.8. Done Port Settings
- Configuration on Android
Make your Android as a Wireless Access point.
Settings->Wireless and networks -> Tethering and portable hotspot -> Centang Mobile AP
- Connection Step
>> Run Unified Remote Server on PC
>> Connect the PC to your Android Wireless Access Point. default name AndroidAP
>> Run Unified Remote Application on Android
>> add Server
>> Go to Remote Menu
5. If you want to give the password on the Unified Remote PC
- Click security tab and check enable password protection